
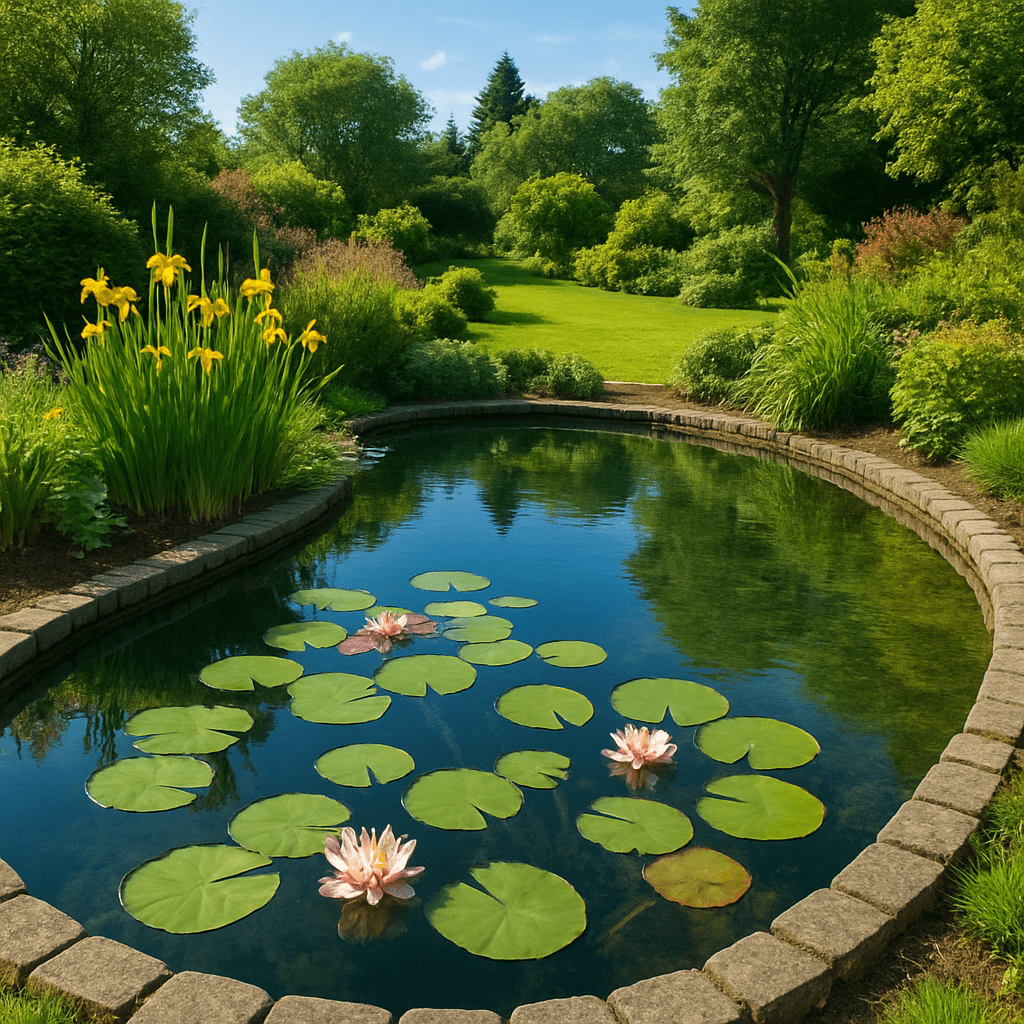
Having your own garden pond is the absolute highlight of the home green oasis for many garden owners. The gentle splashing of water, shimmering dragonflies dancing on the surface, and lushly blooming water lilies create an unparalleled place of relaxation. But the joy can quickly be overshadowed. Sooner or later, many pond owners ask themselves the anxious question: Why is my pond losing water in the summer?
It is often suspected that there is a hole in the liner or extreme evaporation due to heat. However, in most cases, the problem lies elsewhere: at the edge of the pond. When the pond water comes into direct contact with the surrounding soil, the soil soaks up the water like a sponge. To stop this phenomenon, there is an essential construction measure. Anyone who is familiar with the topic Capillary barrier in a garden pond: Basics of pond edging busy - lays the foundation for a permanently functioning and easy-to-maintain biotope.
In this comprehensive guide, you will learn everything you need to know about the Pond capillary barrier You need to know which materials are suitable and how to effectively avoid mistakes during pond construction.
What is a capillary barrier and why is it so important?
We are all familiar with the principle of capillarity from everyday life, for example, when a sugar cube is dipped into coffee and the brown liquid is drawn up rapidly. The exact same thing happens on unsecured pond banks.
Dry garden soil, roots from lawns or shrubs, and drooping plant leaves act like tiny tubes (capillaries). If they touch the pond water, they will relentlessly suck it into the surrounding bed. On hot days, hundreds of liters of water can be lost this way. The solution? You have to Stop pond water loss.
A capillary barrier (also called a wicking barrier) is a physical separation between the pond water and the surrounding soil. It has three primary functions:
- Day Prevent slime effect at the pond edge.
- Preventing root growth in foil ponds, as strong roots (e.g., from bamboo or trees) could penetrate the film in search of water.
- The Preventing algal blooms with pond liners, by preventing nutrient-rich water (or fertilizer) from being washed from the garden into the pond during heavy rain.
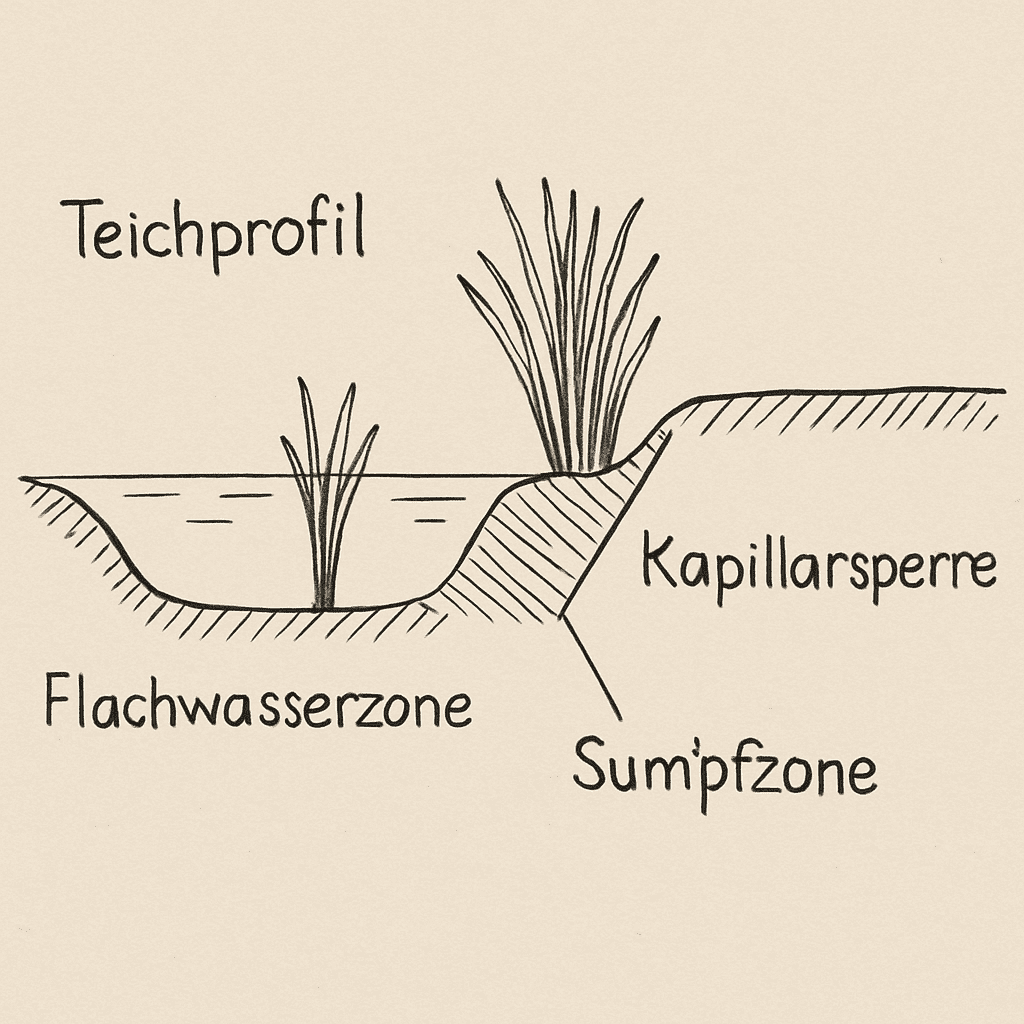
The Perfect Pond Design: Profile and Depth Zones
To build a functional lock, the pond bank must be properly shaped during excavation. A well-thought-out Pond profile for stable water level That's the be-all and end-all. If the bank slopes too steeply, earth and plants will later slide into the pond. If it's too shallow, you run the risk of the garden and pond merging into each other.
It is advisable to already, when digging Determine optimal pond depth at the edge. A shallow marsh zone (approx. 10 to 20 cm deep) at the very inner edge is ideal for many marginal plants. Behind this zone, a small berm follows, which forms the actual capillary barrier. This berm must lie precisely horizontally (in the water) at all points of the pond so that the pond can be filled to the brim later without overflowing at a lower point.
Pre-built pond edge system vs. DIY solution: What's better?
When it comes to Sealing pond liner correctly at the edge Teichbauer are faced with the choice between professional systems and pragmatic DIY solutions. Both paths can lead to success if carried out correctly.
The DIY solution (foil setup)
In the classic DIY solution, the pond liner is not simply buried flat at the edge, but rather set up vertically. Behind a small earthen embankment, a trench is dug into which the liner is placed vertically and secured (e.g., by wedging it between fieldstones).
- Advantages: Very cost-effective, flexibly adapts to irregular pond shapes.
- Disadvantages: Can settle over the years due to ground movement; sometimes more difficult to conceal visually.
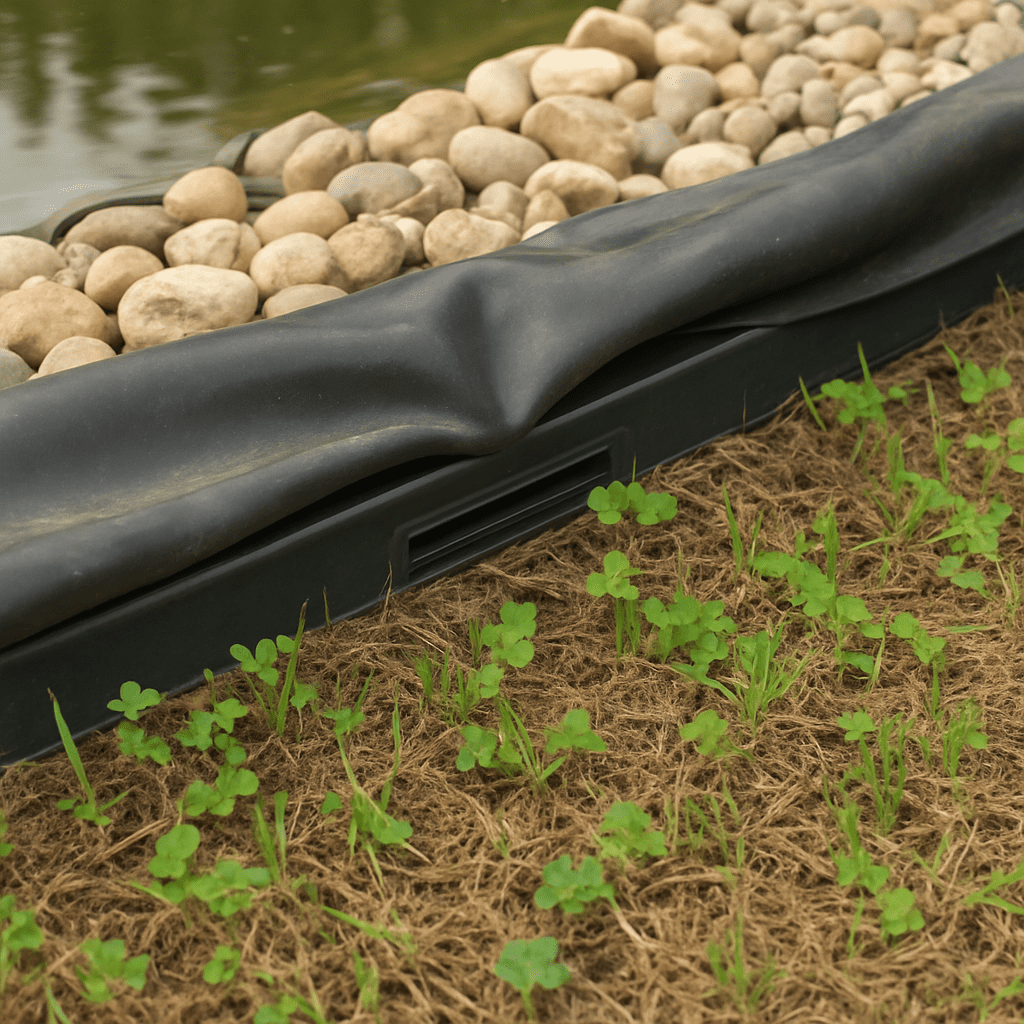
The pond edge system
Whoever wants to be absolutely sure chooses a professional system. When it comes to the question System edge vs. DIY solution The finished system stands out for its exceptional durability and perfect leveling. These systems typically consist of sturdy ground stakes and flexible straps (often made from recycled plastic), which are driven into the ground along the shore and secured with screws. The pond liner is then laid over this fixed edge.
- Advantages: Permanently stable, precisely horizontally alignable, clean edge.
- Disadvantages: Higher purchase costs, requires some DIY skills for screwing.
The right Materials for permanent capillary barriers in addition to the mentioned recycled plastics (like Ecolat), also include stainless steel profiles, rot-proof plastics, or properly installed lean concrete borders.
Design Options: Shore Ditches, Mats, and Gravel
A bare foil edge at the pond's edge is visually unappealing. The goal of any good garden pond capillary barrier is to remain invisible while it does its work in the background. There are various proven methods for this.
The ditch along the bank: Swamp idyll without water loss
Many pond owners wish for lush plants right at the transition to the lawn. How does a marginal ditch work in pond construction? The concept is brilliant: outside the actual capillary barrier, another shallow trench (approx. 15-20 cm deep) is created, which is also lined with foil. The capillary barrier forms a small dam between the main pond and the adjacent trench.
The bankside ditch is filled with pond soil and planted. Since it is separated from the main pond, you can here Minimize water loss from riparian vegetation. When it rains or water overflows, the ditch fills up. However, when it dries out, it does not draw water from the main pond. This creates a moisture-loving plant zone that visually blends with the pond but is physically separate.
Edge mats for a green edge
To hide the slide above the lock, you can use a Combine edge mat with capillary barrier. Bank mats are dense fabrics that are placed over the edge of the pond. They protect the liner from UV radiation and frost pressure. Attention: The mat must not protrude into the surrounding soil, otherwise it will act as a wick itself! It must end at the edge of the capillary barrier. Mosses and small creeping plants quickly settle on the mat, which ensures a very natural transition.
The Gravel Barrier
Another aesthetic option is to use a Establish buffer strips as a biological barrier. A small trench is dug behind the raised edge of the foil and filled with washed coarse gravel or rolled gravel. Gravel has no capillary action. Lawn roots find no footing or water here, thus maintaining a permanent separation.
Step-by-step guide for building a pond edge
So that your capillary barrier garden pondTo ensure projects succeed from the start, here's a practical Step-by-step guide for building a pond edge. In this example, we assume the use of a pond edge system (plastic sheeting with stakes) as this is the safest method.
Step 1: Level and Stake
After the pond has been excavated, mark the exact height of the future water level. Drive the stakes of the pond edge system into the ground at intervals of approximately 50 cm along the bank. Use a spirit level or a rotating laser so that all stakes end at precisely the same height.
Step 2: Screw on the edge band
Now attach the flexible plastic strip (the actual barrier) to the stakes. Screw it on the inside (towards the pond). The strip must be exactly horizontal at all points, as this defines the maximum water level.
Step 3: Lay fleece and foil
Lay the pond liner and then the pond film in the pit. Pull the film over the plastic strip outwards. Avoid strong tensions; the film must lie loosely in all zones of the pond.
Step 4: Fill the pond
Fill the pond with water now., before Cut the film, or finish shaping the edge. The weight of the water will pull the film into its final position. Ideally, wait one to two days.
Step 5: Secure and trim the film
Now you can the Sealing pond liner correctly at the edge. Do not cut the film flush directly behind the plastic tape! Leave an overhang of about 10-15 cm. Fold this overhang down or place it vertically in a small gravel trench (the so-called safety strip).
Step 6: Optical Lamination
Now install bank mats, stones, or planting bags. Be meticulous in ensuring that no soil from the outside falls over the edge into the pond and that no bank mat comes into contact with garden soil.
Care and Maintenance: How to Keep Your Pond Edge Watertight
Even the best Capillary barrier in a garden pond: Basics of pond edging requires some attention. A garden pond is a dynamic system. Over the years, plants grow, soil shifts slightly due to frost, and autumn leaves blow around.
Conduct a walk-through along the pond bank twice a year (preferably in spring and late autumn):
- Cut off roots Check if grass roots, vigorously growing ground covers (like creeping jenny), or shrubs have grown over the barrier into the pond. Trim these back consistently.
- Remove earth: Sometimes wind or animals carry soil onto the dam, which can act like a bridge for water. Sweep or rinse away these „earth bridges.“.
- Check bank mats: Check if the bank mats have been pulled outwards into the garden soil by plant growth.
A practical tip: If your water level drops rapidly in the peak of summer and you suspect a wicking effect, perform the „bucket test.“ Place a water-filled bucket next to the pond and mark the water level in the bucket and in the pond. If the water in the pond drops significantly more than in the bucket after 24 hours (evaporation reference), you very likely have a leak or a leaky capillary barrier. Then, feel along the edge – where the ground outside the pond is unusually wet and muddy, you will find the „bridge.“.
Conclusion: The capillary barrier is the heart of pond construction
Building a garden pond requires muscle power, time, and attention to detail. If you follow the guidelines for a functional capillary barrier pond In the following years, save yourself a lot of frustration, unnecessary water costs, and extensive repairs.
Whether you opt for a robust pond edge system or a clever DIY solution with a gravel trench: consistent separation of garden soil and pond water is the only way to ensure a stable water level and prevent algae problems caused by washed-in nutrients. Plan the pond profile conscientiously, integrate optical highlights such as a planted shore channel, and enjoy a biotope that will bring joy not only to you but also to the local wildlife for years to come.
Make the edge sealing not an afterthought, but a priority – your pond will thank you with clear water and constant abundance!